


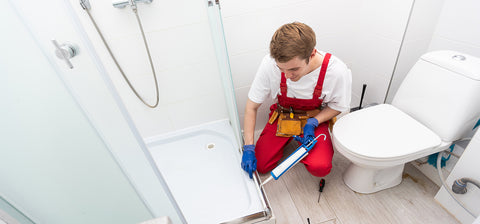
How to Fit a Shower Enclosure: A Step-by-Step Guide

Table Of Contents:
-
How to Fit a Shower Enclosure
-
Choosing the Right Shower Enclosure and Tray
-
Gather Your Tools and Materials
-
Preparing for Installation
-
Installing the Stone Resin Shower Tray
-
Fitting the Shower Enclosure
-
Seal with Silicone
-
Final Touches and Testing
-
Conclusion
How to Fit a Shower Enclosure
Fitting a shower enclosure can be a rewarding DIY project that adds both functionality and style to your bathroom. In this step-by-step guide, we'll walk you through the process, ensuring a successful installation.
Step 1: Choosing the Right Shower Enclosure and Tray
Before you begin, select the appropriate components. Consider:
- Shower enclosure shape and style (e.g., quadrant, corner, walk-in).
- Shower tray material (e.g., stone resin, acrylic).
- Compatibility in terms of size and style.
Step 2: Gather Your Tools and Materials
Ensure you have all the necessary tools and materials:
- Electric drill
- Spirit level
- Clear silicone sealant
- Sealant gun
- Small screws and screw caps
- Wall profiles
- Door panel (if applicable)
- Riser kit (if needed)
- Shower trap
- Access hatch (for waste outlet pipe)
Step 3: Preparing for Installation
Proper preparation is crucial. Follow these steps:
- Measure and mark the installation location accurately.
- Check water outlet alignment and compliance with regulations.
- Ensure the bathroom floor is level and structurally sound.
- Inspect the stone resin core of the shower tray.
Step 4: Installing the Stone Resin Shower Tray
Proceed with the installation of the shower tray:
- Position the tray, aligning it with your markings.
- Seal edges with clear silicone sealant.
- Secure the tray by screwing it in place, ensuring it's level.
- If required, install a riser kit following the manufacturer's instructions.
Step 5: Fitting the Shower Enclosure
- Now, it's time to assemble and fit the shower enclosure based on its type:
- For frameless walk-in or quadrant enclosures, assemble as instructed.
- Corner shower cubicles should be attached securely to wall profiles.
- Walk-in showers must be assembled, ensuring a secure attachment.
- Attach shower doors, if included.
Step 6: Seal with Silicone
To prevent water leakage, seal any gaps between the enclosure and the wall using clear silicone sealant.
Step 7: Final Touches and Testing
Complete the project with these final steps:
- Position any required access hatch for the shower tray waste opening.
- Test the installation by running water in the shower, checking for leaks and proper drainage.
- Make any necessary adjustments to ensure a perfect fit.
Conclusion:
Congratulations on successfully fitting your shower enclosure and stone resin shower tray. This DIY project not only enhances your bathroom but also provides you with the satisfaction of a job well done. Enjoy the comfort and convenience of your new shower space.