


![How Much Does Bathroom Leak Repair Cost? [2026 Data]](http://tapron.co.uk/cdn/shop/files/How_Much_Does_Bathroom_Leak_Repair_Cost_2026_Data_5a2dc49e-50fc-44a5-8221-2082adec9f8a.webp?height=700&v=1767096503)


Table of Content:
-
Introduction
-
Why Bathroom Mould Keeps Appearing
-
How to Remove Bathroom Mould Safely
-
How to Stop Mould Coming Back
-
Common Mistakes to Avoid
-
When to Call a Professional
-
Conclusion
Introduction
Bathroom mould is one of the most common problems in home improvement, and it is rarely just a cosmetic issue. Those black marks around sealant, grout lines, ceilings, and corners usually point to a bigger moisture problem caused by steam, poor ventilation, condensation, or a hidden leak. Left untreated, mould can stain finishes, shorten the life of bathroom fixtures, and make the room feel damp and neglected.
The good news is that small patches are usually manageable with the right cleaning method and a few smart changes to your daily routine. The real solution is not only removing the visible mould, but also controlling the moisture that allows it to return. Whether you are freshening up a family bathroom or planning a full bathroom renovation, understanding how to treat mould properly will help you protect both your space and your investment.


Why Bathroom Mould Keeps Appearing
Bathroom mould usually returns because the room stays damp for too long after use. Showers, baths and even normal washing release large amounts of moisture into the air. That moisture settles on cooler surfaces such as walls, ceilings, mirrors, window reveals, tiles, grout and silicone. Once those surfaces stay wet or repeatedly collect condensation, mould spores can settle and grow. In other words, mould is often not a stand-alone cleaning issue; it is the visible result of a moisture problem that has not been controlled.
The usual causes are more practical than people expect. Weak extraction, blocked or underperforming fans, no useful background ventilation, closed-up windowless bathrooms, cracked grout, failing sealant and small leaks around baths, basins, shower trays or enclosures all create the conditions mould needs. Even habits such as leaving wet towels in a heap or allowing water to sit on shower glass and trays can keep local humidity high enough for mould to return. A specialist way to think about it is this: the mould patch you can see is rarely the whole problem. The real problem is the repeated presence of moisture where the room is not drying properly.
That is why simply wiping the stain away is only half the job. The EPA’s guidance is very clear that moisture control is the key to mould control: clean the mould promptly, but also fix the water problem. If the source of damp remains, the staining may disappear briefly, but the mould will usually return because the environment has not changed.
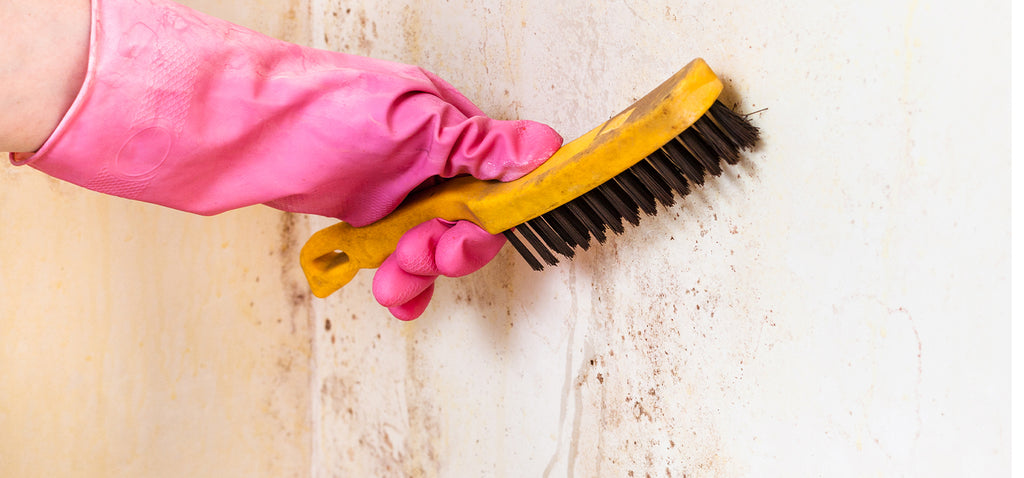
How to Remove Bathroom Mould Safely
For small patches, safe cleaning is usually possible at home, but it is worth treating the job with more care than a routine wipe-down. As a rule, the EPA says areas under about 10 square feet can often be handled without specialist remediation. Before you start, open a window if possible, run the extractor fan, wear gloves and avoid breathing in spores. Eye protection is sensible when working overhead or using stronger products, and an N95-type respirator may be worth considering for people who are sensitive to mould. Never mix bleach with vinegar or any other cleaner or disinfectant, because that can release dangerous fumes.
On smooth, hard bathroom surfaces such as glazed tile, glass and many sanitaryware finishes, the safest starting point is usually a mild detergent or a product specifically intended for mould removal, used exactly as the label directs. Scrub gently rather than aggressively, then rinse and dry the area fully. The important part is not only removing visible staining, but also leaving the surface dry afterwards, because moisture left behind helps the cycle begin again.
Grout and sealant need a more careful approach because they are common failure points in wet areas. Grout can allow moisture deeper into joints when it is cracked, crumbling or no longer performing well, and silicone around trays, baths and enclosures often needs replacement once black spotting has penetrated or adhesion has failed. In those cases, repeated scrubbing may improve the appearance without solving the real issue. A better long-term fix is often to remove failed silicone, let the area dry properly, and reseal with a mould-resistant bathroom product; likewise, visibly damaged grout is often better replaced than endlessly cleaned.
Painted walls and ceilings are another area where people often waste time by treating the symptom instead of the cause. If mould is only surface-level, careful cleaning and thorough drying may be enough. But if paint is bubbling, flaking or peeling, or if the wall feels soft, moisture may already be affecting the material underneath. Painting over mould without first cleaning and drying the area is a common mistake, and EPA guidance warns that paint applied over mouldy surfaces is likely to peel.
How to Stop Mould Coming Back
Removing mould is the quick part. Prevention is what protects your bathroom long term. The first priority is ventilation. Good ventilation removes stale, moisture-laden air before it can settle as condensation. In the UK, a common benchmark for bathrooms is mechanical extraction of 15 litres per second, with a 15-minute overrun after the room is vacated. That matters because many bathrooms are still left damp long after the shower has ended, especially if the fan is weak, dirty or switched off too quickly. In practical terms, one of the most valuable bathroom upgrades is often not a new finish or fitting, but a properly sized, properly used extractor fan.
The second priority is reducing surface moisture. Drying shower glass, trays, tiled walls and grouting after use makes a genuine difference because it shortens the time those surfaces stay damp. Hanging towels and bath mats so they dry properly matters too; leaving damp fabrics bunched on the floor or over the side of the bath keeps moisture in the room. These are small habits, but they change the microclimate of the bathroom and make it harder for mould to re-establish.
Humidity control is the third piece of the puzzle. EPA guidance recommends keeping indoor humidity below 60%, ideally between 30% and 50%, and notes that a simple humidity meter can help identify rooms that are staying too damp. That is especially useful in windowless bathrooms, en-suites and rooms that seem dry on the surface but still smell musty. If humidity remains stubbornly high even with a fan running, it may point to an underperforming extractor, poor air movement, hidden moisture or the need for extra drying support such as a dehumidifier outside the wet zone.
Regular maintenance matters just as much as cleaning. Bathrooms fail slowly before they fail obviously. A hairline crack in the grout, a peeling bead of silicone or a small leak under a basin can feed enough moisture into the room to keep mould active for months. Sealant around baths, sinks and shower trays should be silicone rather than grout, and it should be replaced once it loses adhesion or starts allowing water into gaps. In practical terms, small maintenance jobs are what protect walls, tile backings and joinery from much bigger repair bills later.

Common Mistakes to Avoid
The biggest mistake is treating mould as a stain instead of a warning sign. If condensation, poor airflow or a hidden leak is still present, the mould is simply doing its job of showing you where moisture is collecting. Another mistake is cleaning with the wrong product on the wrong surface. Natural stone guidance warns that products containing vinegar, lemon or other acids can dull or etch calcareous stone, so bathroom cleaning products should always be checked against the surface manufacturer’s care advice.
Another common error is redecorating too early. If mould has not been removed fully, or if the underlying surface has not dried out, new paint will not solve the problem and may fail quickly. And finally, many homeowners wait too long to replace damaged sealant or grout because it still looks mostly fine. In wet rooms and family bathrooms, that delay is often what allows moisture to move behind finishes and turn a surface problem into hidden water damage.
When to Call a Professional
Professional help is worth getting when the mould is widespread, keeps returning despite better cleaning and ventilation, or appears alongside signs of more serious water damage such as soft walls, swelling, persistent staining, leaks or damaged ceilings. EPA guidance suggests that once the affected area is larger than about 10 square feet, or if the water damage involves sewage or contaminated water, specialist remediation is usually the safer route. In real homes, repeated mould around one corner or one enclosure often means there is more going on behind the finish than the eye can see.
Conclusion
The best way to deal with bathroom mould is to combine safe cleaning with proper moisture control. Clean what is visible, dry the area thoroughly, then focus on the reason the mould formed in the first place. In most bathrooms, that means better extraction, drier surfaces, lower humidity, and closer attention to sealant, grout and small leaks. Done properly, this approach does more than improve appearance. It protects finishes, reduces the risk of hidden water damage, and creates a bathroom that is healthier and easier to live with over the long term.
Explore our other related blog posts :
-
How to Clean Bathroom Fast (Don't Miss These DIY Tips)
-
How to Fix a Smelly Bathroom Sink (Guaranteed Success)
- Natural Ways to Clean Your Bathroom (Chemical-Free)